Greenhouse buyer's guide - Short version
Greenhouse buyer's guide
How do I go about choosing a new greenhouse?
In an ideal world, with plenty of suitable land on which to site your new greenhouse and cost is not an issue, the growing capacity you require is likely to determine the size and style you finally choose for your new greenhouse. Without space and budget constraints your choice is vast! Keen amateur gardeners may choose a small greenhouse (6' wide by 10' long), while gardeners who require a much bigger growing capacity might opt for a large greenhouse, for example 10' wide by 14' long.
However, back in the real world, our experience is that for most people, choosing a greenhouse inevitably involves a trade-off between the growing capacity (and therefore size of greenhouse) you would ideally like and the actual physical space you have in your garden to put it!
In short, your eventual choice of new greenhouse is likely to boil down to how much space you have available in your garden that catches most sunshine and which can be easily levelled to provide good foundations and has convenient access.
What practical tips can I follow?
Survey your garden
If you start by doing this first, you'll quickly identify all the options you have for the best position for your new greenhouse. There are seven main factors to bear in mind:
- Best position and aspect
Many "text books" recommend that a greenhouse should be positioned so that the ridge-line of the roof lies east to west to ensure that the longest side of the greenhouse will be fully exposed to the sun from the south. While there is an advantage in following this advice, particularly for long greenhouses such as 8'by 20', our advice is not to overestimate its importance. Why? Because the most common sizes of greenhouses, such as the 6'by 8' and 8' by 10', are virtually square so an east to west orientation makes little practical difference. It's sufficient to position any one side of a small or medium sized greenhouse in a south or southwest facing aspect for best exposure to sunlight.
However, don't worry if this isn't possible because at between 7' and 8' tall, even if only the roof catches direct sunlight, this will be sufficient to warm-up your greenhouse considerably. Anyway, it's a fact that the first thing many gardeners do is to shade their new greenhouse with green netting!
- Good foundations for the greenhouse base
A level, or almost level, site will require less work to achieve a good floor area for the foundations of your greenhouse. The most popular method of making a foundation is to lay flag stones ensuring an overlap of at least 6 inches outside the dimensions of the greenhouse base.
However, fixing your greenhouse directly into the soil is not nearly as secure or as strong as bolting the base of the frame to a hard surface.
Most greenhouses are supplied with an aluminium base on which to mount the greenhouse frame. While this is adequate, our experience shows that the stronger the base the better. This is why we offer our specially designed and unique galvanised metal base, with superior fixings, as an option on all ranges of traditional greenhouses.
- Shelter from the wind
If your garden is in an exposed position then consider the proximity of hedges or fences that will provide some shelter from the direction of the prevailing wind.
All greenhouses, even the very best ones, are vulnerable to strong winds so in the absence of shelter we would advise you to erect a fence or plant a hedge to provide at least some protection for your greenhouse.
At some point, it is worth checking that any storm damage to your greenhouse will be covered on your house insurance.
- Avoid Trees
To prevent potential damage to your greenhouse, overhanging trees are best avoided if at all possible!
- Ease of use and maintenance
When deciding on the position for your greenhouse, also consider how convenient it will be to gain access to it. It's surprising how many people overlook this point when placing their greenhouse at the very bottom of their gardens! On a dark, wet winter night you may not feel inclined to nip out to check that everything is OK in your greenhouse!
You will find that maintaining the appearance of your greenhouse will be much easier if you opt for whole pane toughened glass, instead of the traditional small glass panes supplied as standard with most greenhouses. As well as being toughened they look far neater and are far less prone to a build up of algae along the edges of the panes so making cleaning a simple job.
- Services
Consider how you will route water and perhaps an electricity supply to your chosen site. You will be surprised at how many useful greenhouse gadgets require electricity, for example, heaters, general lighting, growing lamps, propagators and automatic watering systems to name but a few!
- Visual appearance
This is an important factor for many greenhouse buyers since they want their new greenhouse to blend into their existing garden landscape. Thankfully the time has long gone when the greenhouse was an "eyesore" and had to be hidden at the bottom of the garden!
The standard colour finish for greenhouses is dull silver, the colour of plain aluminium. However as an optional extra we are able to offer most greenhouses in a range of attractive colours that will greatly enhance the visual appeal of your new greenhouse. Not surprisingly, green is by far the most popular colour chosen by our customers!
I've decided on the best position for my greenhouse, now what do I do?
- Measure your preferred site
A greenhouse is impossible to select and price up until you know the width and length of your site. When measuring your site don't be tempted to squeeze a quart into a pint pot! Remember to leave sufficient space around the perimeter of the greenhouse base, for example 1.5 metres, to allow you access for cleaning or to water butts.
- Understand the standard dimensions of greenhouses
The most important measurement is the width - traditional greenhouse styles (see below) generally offer a choice of nominal widths, in 2' increments e.g. 4', 6', 8', 10', 12' etc. The length of the greenhouse can then be specified to fit into the site you have measured. Again, traditional greenhouses are available in multiples of 2' lengths e.g. 4', 6', 8', 10' etc.
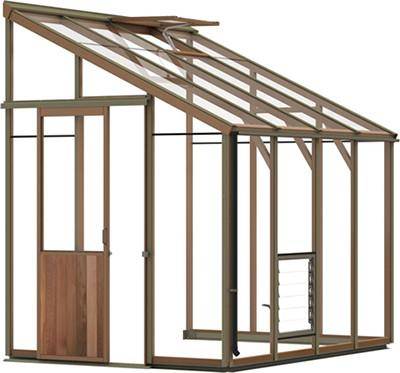
A similar principle applies to lean-to greenhouse styles, although you'll find a slightly more restricted choice of widths and lengths.
What are the most common greenhouse styles?
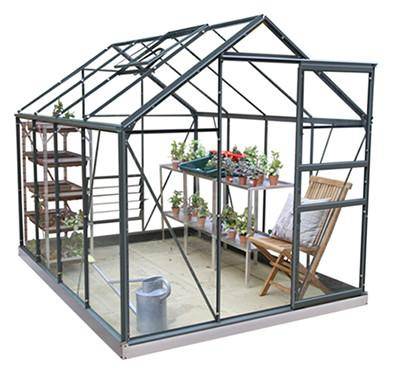
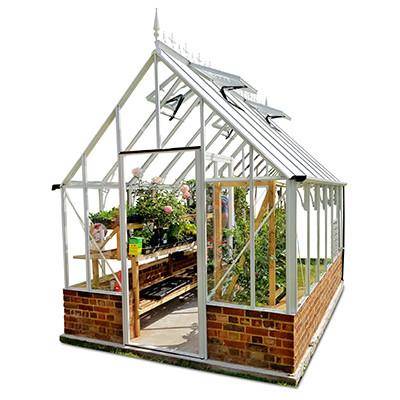
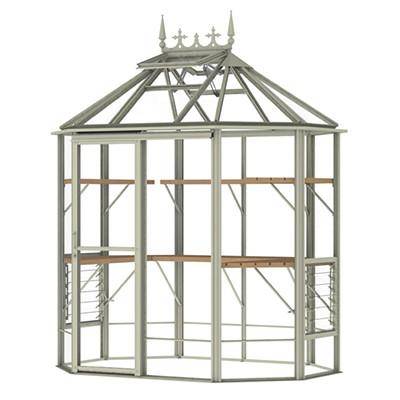
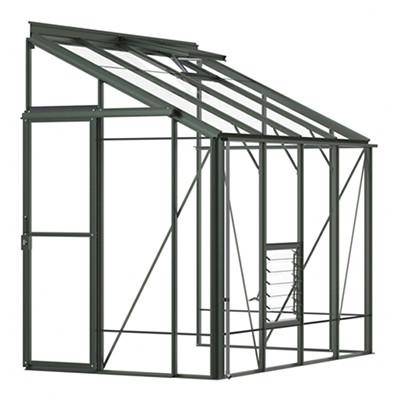
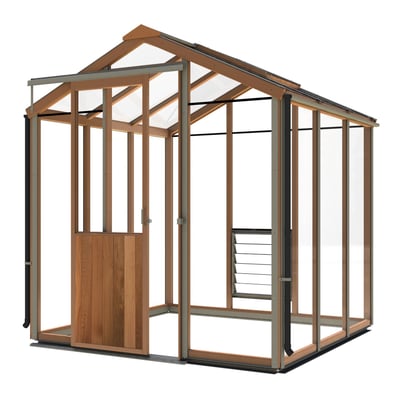
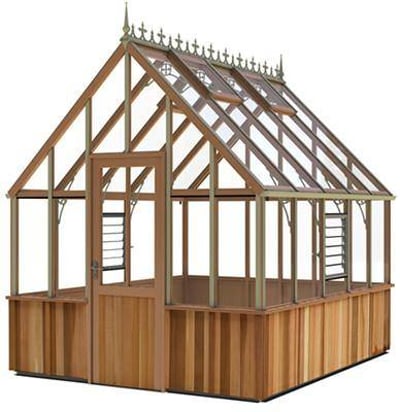
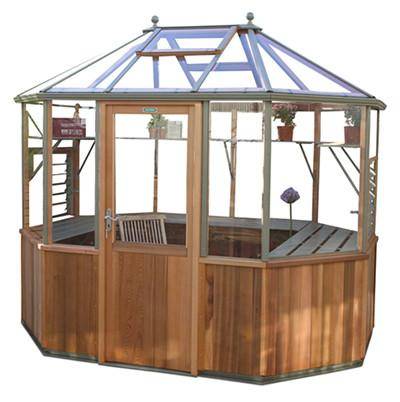
Essentially, there are three distinct greenhouse styles available to choose from,Traditional, Lean-to or Octagonal. The traditional or freestanding greenhouse is the UK's most popular style. Because they are available in so many sizes (i.e.many widths and various lengths) it's likely that you'll find a suitable space in your garden to site one.
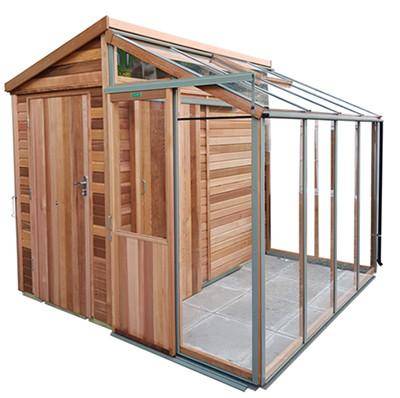
An octagonal style of greenhouse makes a delightful garden feature that is still practical for housing your seedlings and plants when optional shelving sections are added. The lean-to style takes advantage of an existing wall, for example a south facing house or garage wall. A big advantage of a lean-to is that the wall itself acts as a storage heater by releasing the stored warmth of the sun into the greenhouse during the night, so creating a good growing environment.
What size of greenhouse do I need?
Assuming space in your garden is not an issue, this largely depends on how much growing you are planning to do, and to a lesser extent how much storage space you will need inside your greenhouse. However, most gardeners know that the most common complaint about greenhouses is that they are too small! We therefore advise you to choose the biggest greenhouse you can accommodate in your garden and can afford. If for example you were thinking of buying a 6'by 8' then, if you have the space and budget, consider upgrading to a 6'by 10'.You'll be amazed at the difference in usable space this will give you!
Greenhouses can be divided into three size groups based on width:
- Small Greenhouses
- Medium Greenhouses
- Large Greenhouses
How do I maximise growing capacity?
The average starter greenhouse is our top selling 6' by 8' i.e. 6' wide by 8' long. Although this is classed as a small greenhouse, it provides enough room inside to install an 8' length of two-tier staging, with additional shelving above, placed down one side. This is an ideal working bench with enough space to keep your potted plants. On the opposite side of the 2'pathway there is still space for a row of grow bags for tomatoes or other tall plants and additional shelving. This case illustrates how the effective use of a mix of shelving and staging can significantly increase the growing capacity of even a small greenhouse.
Which is the best foundation for drainage, concrete or paving slabs?
You can choose to sit your metal base straight onto either a concrete foundation or one made of paving slabs and then use screws to secure the base of the greenhouse into position. We would advise the use of paving slabs in preference to solid concrete for the foundations. This is because slabs provide natural drainage inside the greenhouse by allowing water to escape through the gaps between the slabs. This natural drainage of your greenhouse floor is a very important benefit of using a foundation made with slabs. If you put in a solid concrete floor with a membrane and then paint or tile it, it will look very nice, but you'll find puddles of water forming on top of the floor which may cause you to slip-up. This is a hazard best avoided.
It's a fact that no greenhouse is 100% waterproof! Water can come in under the bottom of the base, from watering spills or from an occasional leak and so it's very important to allow the water somewhere to escape naturally.
How accurate do the measurements of my foundations need to be?
If you decide to follow our recommendation to use paving slabs for your foundation, the accuracy of measurements is not critical. We recommend that you make the area of slabs bigger than the footprint of the greenhouse. For example, for a 6'by 8' greenhouse, you might slab an area 8'by10'. If you wish, this will then allow you to position water butts on a firm foundation either side of your greenhouse.
Important - the area of your foundation must be larger than the nominal size of the greenhouse. Please be aware that a 6'by 8' greenhouse is called that for ease.The actual dimensions are usually a few inches bigger e.g. 6'3" by x 8'5". To obtain the actual width and length of any greenhouse in this Guide, please use the metric measurements (expressed in millimetres) found in the tables presented for each greenhouse.
I've got some slabs down but they're not absolutely level, will they do?
If you want to use an existing foundation that isn't quite right, then its nothing to worry about! This is where your metal base comes in handy. Our advice is to erect the greenhouse, level it up, square it up and complete its assembly. When assembled, you will find some gaps around the bottom of the base where the slabs are low.Your last job can then be to fill them in with mortar. This simple technique is useful where your slabs are uneven or fall just 2 or 3 inches over the length.
What can I do if the area of my slabs is not big enough?
Rather than lay more slabs, you can always position the greenhouse half on the slabs with the metal anchor legs of the base at the remaining two corners (that are off the slabs) placed directly into the soil and secured using a small amount of concrete.
A level foundation of paving slabs is ideal for both locating the matal base of your greenhouse and for drainage.
What sort of greenhouse base will I need?
Traditionally, greenhouses always used to sit on a little brick plinth. Now however, most of the greenhouses in our range are supplied complete with a metal base. This means that you can fix the greenhouse straight onto either a concrete footing or a base made up of concrete slabs. Greenhouse manufacturers make various types of metal base.Using our experience of installing greenhouses we decided to offer our customers a base design that incorporates all the best features of these bases but which is simple to install and much stronger in order to achieve an improved life-span. Our galvanised metal bases include anchor legs in each corner, more on greenhouses of 10' length or above. This design allows you can anchor your greenhouse straight into the soil by digging a hole in the ground under each anchor leg and then use concrete to secure the legs into the ground.
However, while this method maybe satisfactory, we would strongly advise that you should always have a solid concrete or paving slab foundation under you greenhouse, especially if it is larger than 6'by 8'.
Do I need a metal base? Why not fix my greenhouse straight onto slabs?
Yes you will need a metal base on most greenhouses, the exception to this is the Hercules range of greenhouses and Robinsons range of greenhouses.This is because greenhouses would traditionally sit onto a small brick wall so that the bottom sill of the greenhouse frame would overlap the edge of the brick.
Using a metal base removes the need to build a small brick wall because the greenhouse can now overlap the metal base.You can of course get around this problem if you decide to sit the greenhouse onto a thin piece of wood, such as a roofing lath. However, by adopting this approach you will not achieve another important benefit of using a metal base - it gives you an extra four or even five inches of extra height inside your greenhouse. This can make a big difference.
Why should I choose the unique Greenhouse People metal base?
On most of our best selling greenhouses we can now offer you our unique metal base. All the different manufacturers offer their own particular base, but we have designed our own base taking all the best features from the bases available from the different greenhouse manufacturers.
Features of our metal bases:
- Made from steel for strength and galvanised to prevent rust.
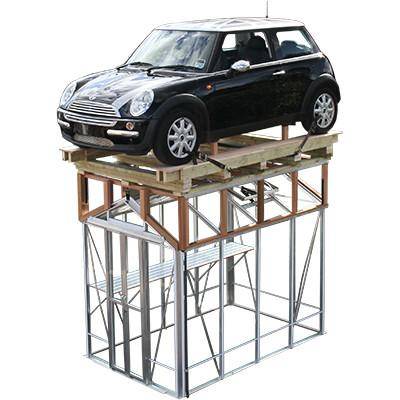
- Neater finish (as pictured) since the outside face is smooth.
- Complete with an anchor leg in each corner, plus extra legs on longer models for anchoring into soil.
- Brackets are provided to fix the metal base to greenhouse frame making it much easier to install the greenhouse because less drilling is required.
- Guaranteed for 10 years - for peace of mind.
- Full instructions included.
Of course, if you would rather have the greenhouse base that is supplied by the manufacturer then please request this, there is no extra charge.
How do I anchor the metal base down?
If you're planning to fix your greenhouse onto foundations made with either concrete or paving slabs, please ask for our concrete anchoring set. This consists of a pack of 10 screws & raw plugs of the correct size to do the job.
Our advice is to use a 7mm hammer drill to make the holes for the screws (2" No.10s) and compatible brown raw plugs. Usually you can just drill through the bottom flange of the metal base straight into the slabs and then screw it down.
Coloured Finish
Over the past ten years there has been a real change in the greenhouse market. In the 'old days' greenhouses were often considered an eyesore and were hidden at the bottom of the garden! Now, that's all changed with the introduction of powder coating technology which enables a range of coloured finishes to be applied to the bare aluminium greenhouse frame.
Your greenhouse can now be supplied in the colour of your choice and this can make your greenhouse a really special feature of your garden. Green is by far the most popular colour, because it blends in so well, but if you're a Ground force fan, we've even got blue!
What is powder coating and how is it done?
Compared to conventional "wet" paints, powder coating is a relatively new technology that provides a vastly superior finish when applied to metals. The entire aluminium greenhouse frame goes through a 5 stage chemical pre-treatment process. This cleans the metal of grease etc and provides a chemical 'key' that helps the powder to stick. The bars are then individually hung onto jigs and sprayed with a dry powder of the required colour. The powder is charged with an electro-static charge and this results in the powder clinging to the aluminium. The bars are then baked in an oven at around 200 degrees Celsius.
How long does powder coating last and will it need re-painting?
No, you will never have to re-paint your greenhouse. All powder coating is guaranteed for 10 years and usually has a life of 15-25 years.
What colours are available?
Most greenhouse models are available in any of the colours listed in the chart below. However, there are a few exceptions. For example, Robinsons greenhouses use a PVC capping system, which is either green, or white and this colour scheme would make a powder coated blue finish difficult. Please ring us on 0870 442 2328 to check the availability of your preferred colour for your choice of greenhouse.
Standard horticultural glass
This is the standard glass supplied with most greenhouses. Usually the panes measure 2'by 2' and these overlap by about half an inch where they join. Horticultural glass has two major disadvantages - it breaks easily into large and dangerous shards and is difficult to clean. This last point is important because over time the overlap of each small pane can become unsightly as they fill with dirt and algae. We would recommend that you consider an upgrade to whole sheet toughened safety glass.
Toughened Safety Glass
Over the past few years we have been able to dramatically reduce our prices for toughened safety glass. It is now more affordable than ever and today accounts for at least 80% of all the greenhouse glass we supply.
Toughened safety glass has three major benefits:
- It is usually supplied in large panes. This means there are no unsightly overlaps for dirt and algae to collect in and so the whole greenhouse looks smarter and is easier to keep clean
- It is far stronger than horticultural glass leading to fewer breakages. Toughened glass doesn't crack, it either stays whole or shatters!
- If it does break, it is safer as the glass will disintegrate into hundreds of small pieces that will not usually cause serious injury, unlike the injury potential of big shards of horticultural glass.
How is toughened glass made and how strong is it?
Once toughened, it cannot be cut, so all toughened glass is just normal glass cut to size first, then passed through a special furnace which heats up the outside of the glass fast in a way that creates tension on the surface.
How strong is it?
As a rough guide, it will take a hit by a football but not a cricket ball! However please take great care when handling the glass because the edges of toughened glass are its Achilles heel. Never let the edge touch a rough hard surface such as concrete.
What's special about your toughened safety glass?
- We buy all our glass direct from the manufacturer so cutting out the middleman. Our huge buying power means that we can pass on the volume savings direct to you.
- All our toughened glass is toughened to B.S. 6206 Grade A.
- We keep substantial stocks of glass in our factory in Staffordshire and because we have our own delivery fleet we can handle the larger sized panes. This enables us to offer whole sheets on Halls greenhouses. Normally this manufacturer only supplies toughened safety glass in 2'by 2'small panes.
We guarantee that our prices for toughened safety glass are the absolute lowest you can find.
What about polycarbonate glazing?
On some greenhouses, twin wall polycarbonate is a glazing option that is available instead of glass. It does have certain advantages over glass, such as slightly better insulation properties, and it doesn't break like glass so it's considered safer.
However, we would advise you not to specify polycarbonate glazing because:
- It is very lightweight, and flexible and therefore very vulnerable to wind damage. The wind can bend and flex the polycarbonate sheets and cause them to 'pop-out' of the frame. Once wind gets into your greenhouse disaster looms!
- Because polycarbonate is light and flexible, the whole greenhouse frame looses a lot of the rigidity which is otherwise created by the weight of glass glazing material.
- It is Opaque and so you can't see through it properly. You wouldn't be able to see your prize Geraniums from outside the greenhouse!
- In time, the cavity between the twin walls can fill with water that can turn green with algae making it very unsightly.
- Finally, polycarbonate glazing can cost even more than toughened glass!
When you evaluate the benefits and drawbacks of these three alternative glazing materials it's clear why our advice is go for toughened glass.

